A Beginner’s Guide to BERT Architecture

BERT (Bidirectional Encoders Representational from Transformers) is a pre-trained model for Natural Language Processing(NLP) related tasks. It is introduced by the Google AI team in October 2018 in this paper Pre-training of Deep Bidirectional Transformers for Language Understanding. It is trained on Wikipedia and Corpus dataset, it knows the language and context which is quite decent. It has two versions Base(12 encoders) and Large (24 encoders). It is a specific, large transformer masked language model. BERT is built on top of the multiple clever ideas by the NLP community. Some examples are ELMo, the OpenAI Transformer, and The Transformer.

BERT is a quiet large model that is already trained we just fine-tune it according to specific problems by adding some additional fully connected layers. It is very much expensive to train it from scratch. We have to use the pre-trained model either base(12) or large(24) for our problem. The pre-trained model just understands the language and the context and we do fine-tune to train BERT on a specific task. The overall big-picture of BERT pre-trained and fine-tuning is show in below figure:

Pre-training and Fine-Tuning

As you can see in above figure that pre-trained BERT and how we fine-tune it on to our specific task. For example SQuAD(Stanford Question Answering Dataset) for our question and answering task, NER (Name Entity Recognition) and MLNI (Multi-Genre Natural Language Inference). Two specific tasks on which BERT is fine-tuned are as follows.

  • Mask Language Model
  • Next Sentence Prediction
Continue reading “A Beginner’s Guide to BERT Architecture”

How to decompose the time series data?

As in my previous blog, I have discussed white noise in time series data and I said that I will write some blogs on some of the few important concepts in time series forecasting and I would like to share some most important topics which are much needed for better forecasting and analysis. In this blog, I will discuss components of time series data, what is the decomposition of time series data, and how to achieve this in Python.

Basically, decomposition provides a very fine abstract knowledge(generalization) about time series data and it helps to understand the much clear problems during time series forecasting and analysis. Let’s first talk about time series components. There are two main components of abstraction for selecting forecasting methods which are systematic and non-systematic components. Systematic are those components of time series which have consistency in their patterns and can be described directly. Non-systematic are those components of time series that can not be described directly we have to do some pre-processing before describe/model them. A time-series includes three systematic components which include level, trend, and seasonality, and also include one non-systematic component which is noise in time series data.

Let’s just combine the time series components, though a series is a combination of level, trend, seasonality, and noise. For combining these components there are two models, one additive model and another is a multiplicative model. Trend and seasonality are optional because some time series does not have a trend and seasonality through time-series data must have level and noise in it. In the additive model the components are added together as below:
                                 y(t) = Level + Trend + Seasonality + Noise

This model is linear where changes over time are consistently made by the same amount. A linear trend is a straight line. A linear seasonality has the same width and height of cycles. In multiplicative model components are combined together as bellow:
                                 y(t) = Level × Trend × Seasonality × Noise
This model is nonlinear like exponential or quadratic and changes are not constant it can be increased or decrease over time. A nonlinear trend is a curved line and nonlinear seasonality has an increasing/decreasing frequency/amplitude over time. Continue reading “How to decompose the time series data?”

A gentle intro to White Noise

Currently, I am working on time series forecasting and time series analysis. I’m not going to deep inside the time series analysis though I’m focusing on time series forecasting in my blogs. Before this, I was working on digital image processing, computer vision, machine learning,  deep learning, and some other stuff. From the last couple of days, I start working in time series forecasting and I’m really enjoying this domain because in this domain I convert each time series problem into a supervised learning problem which is really what I like. So basically, I decided to post a few blogs of some important concepts. There are a lot of concepts that are very useful in time series forecasting, natural language processing(NLP) and some other domains as well. I can not post blogs on each and every concept though I will post some fewer topics and will provide a list of remaining concepts in my future blogs.

So, let’s get started with white noise. White noise is a crucially important concept in time series forecasting. If the time series is white noise, it can not be predicted because it doesn’t have any specific patterns, it is just a series of random numbers that can’t be predicted. If the series of forecast does not have white noise, it suggests improvements can be made to the predictive model. So very beginning question is what white noise is?

Continue reading “A gentle intro to White Noise”

OpenCV Features of Contours

I am working in Bio-Informatics field. I am in deep of Pathological Myopia Detection and I have a fundus images dataset. One of my tasks is to extract Optic disk from the fundus images which I have done using the UNet model. Now my task was to extract the peripapillary atrophy(PPA) around the Optic disk. For this purpose, I did a lot of research on the Internet and I found many solutions to tackle this problem but the one I love the most is Contours Features. Following is the short intro to Contours features.

First of all, you need to install OpenCV. If you have already installed OpenCV then skip this step. To install OpenCV open your terminal and type the following command:

pip3 install opencv-python

Now, let’s move towards some coding stuff. First of import OpenCV and NumPy and read your desired image and also am resizing my image to 400×400 as follows.

import cv2
import numpy as np
img1 = cv2.imread('myFundImage.jpg',0)
img = cv2.resize(img1, (400,400))

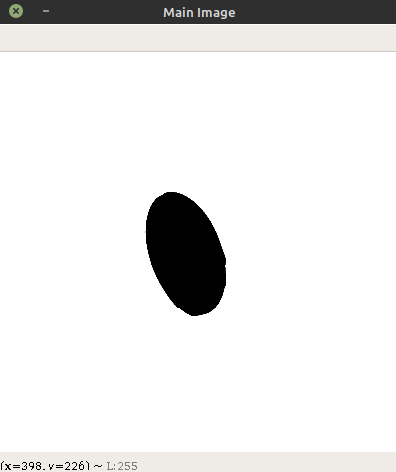
mainImage

Optic disk mask which is extracted

Now let’s take a look at moments of images. Image moments help you to calculate some features like center of the object, area of the object etc. Continue reading “OpenCV Features of Contours”

Programming with ZeroMQ

Recently I am working with OpenCV and YOLO. When I was just using OpenCV for realtime object detection and recognization there was not good enough acuracy in results after I search a little bit more for acuracy I find two options TencerFlow and YOLOv3. I firstly preffer YOLO algorithm for my desired accuracy and I got good enough accuracy in my results. But I lost the number of frames per second. I have Intel® Core™ i5-2330M CPU @ 2.20GHz × 4 sytem and I was getting 0.6 frames per second(FPS) which is very slow as compare to normal video frames. Then I search a bit more and I realize that YOLO can run on GPU very smoothly. So I got access to GPU and now I face another problem that how could I send my video frames to GPU which is on remote and in response GPU will send back these frames after processing and how could I recieve these frames. Now the main issue is how could sync my local system and remote in no time. I find ZeroMQ solution to solve this issue. ZeroMQ has very simple structure and it is compatible with C/C++, PHP, Java, Python, Lua, Haxe, C#, CL, Delphi, Erlang, F#, Felix, Haskell, Objective-C, Ruby, Ada, Basic, Clojure, Go, Haxe, Node.js, ooc, Perl, and Scala. ZeroMQ (also known as ØMQ, 0MQ, or zmq) looks like an embeddable networking library but acts like a concurrency framework. It gives you sockets that carry atomic messages across various transports like in-process, inter-process, TCP, and multicast. Following figure will show its working in simplest way.

Continue reading “Programming with ZeroMQ”

How to install new Magento2 theme manually

Previously I disscussed how to install and configure Magent2 in Linux and now am working in Magento2 development. I faced a problem during installing the new theme in my Magento. I searched a few tutorials on google and some was very confusing so I follow the other documentation. In this blog post I’ll show you that how I install new theme plugin in my Magento2.

I’m going to use Magento in my localhost you can use on your own choice. First of all download your desired theme zip file that you want to install and extract that zip file. Now copy the app and pub folder from extracted theme folder and paste it in your root directory where you install your magento. Since I am running the magento in my localhost so in my case here is the root directory path of Magento.

/var/www/html/magento2

In my case magento2 is root directory of magento. After pasting these two folders open your terminal as root and run few shell commands. Go to your Magento root directory.

~ cd /var/www/html/magento2

If you are using any type of hosting then first connect to your hosting server through ssh. Just go to your magento root directory and follow the same steps below. Firstly run the command to setup upgrade. This command will automatic upgrade all the modules of magento. If any new module is there it will upgraded. Continue reading “How to install new Magento2 theme manually”

Odoo module development on Ubuntu

Previously I disscussed How to Install Odoo on Ubuntu and now I’m working on Odoo module development. I searched the Odoo module development documentation  it was very awkward so I follow an other documentation you can follow any documentation that you want. In this blog post I’ll show you that how I setup my first Odoo module.

I’m going to make my  module in the directly of my choice, I made a directory with name Addons in my ~/Documents:

~ cd Document

~ mkdir Addons

~ cd Addons

~ mkdir module_name

In my case my module name is school. In this school folder create two folders model and view. The model  contains your form view and view folder cotains the the view of  your model. For now I’m not going to deal with model and view this becomes complicated(because I don’t want to mess with the default xml files). Now create two files __init.py and __manifest__.py. The __init__.py file can contain the same Python code that any other module can contain, and Python will add some additional attributes to the module when it is imported. The __manifest__.py file contains  all the information related to your module.
In your __init__.py file write the following piece of code: Continue reading “Odoo module development on Ubuntu”

Install Odoo (OpenERP) 11.0 on Ubuntu16.04

Odoo (formerly OpenERP) is a full-featured business application suite, with more than 700 modules. It provide tons of features while remaining easy to use.odooLogo

I was trying to install odoo11.0 in my Ubuntu system, I search on google and find many different tutorials. I faced many errors with those tutorials. Finally I find the odoo official documentation from here and there are also some confusions with this documentation.

First execute the following command for root.

sudo su

The following python packages are only suggested by the Debian package. These packages are not available in Ubuntu already. First we need to install vobject, pyldap, qrcode and num2words. To install python packages execute the following commands as root:

Continue reading “Install Odoo (OpenERP) 11.0 on Ubuntu16.04”

How To Access Amazon EC2 Instance Graphically

Ever since I started working to AWS cloud computing, everyone had the same question that, “how to use AWS EC2 instance graphically?”. I need the answer to this question, so I explore google and I realize that It is a quite easy job. Finally, I got the solution to this problem on Stack Overflow. In this article I will show you that how to access AWS EC2 instance graphically.
Fist of all open your terminal and connect to your EC2 instance using ssh. After to connect to your instance type following command to update and upgrade the instance.

sudo apt update && sudo apt upgrade

After this for super user type:

sudo -s

Now first you have to install Ubuntu-desktop on your instance. For installation type following command:

sudo apt install ubuntu-desktop

Continue reading “How To Access Amazon EC2 Instance Graphically”

Experience of IEEEXtreme Programming Competition

Yesterday, there was a programming competition of IEEEXtreme.  The duration of this competition was about 24 hours. It was at international level competition in which 4049 teams participated. Including my team three other teams also participated form our university. It was my first experience of such a great competition of programming. Before this I had just participated in national level competitions. By participating in this competition I earned a great knowledge and learned many new things. I also got a great experience of programming competition. Before this I was in a prison of programming but after this competition I feel like a flying bird and feel freedom from the abundance of university courses work. Continue reading “Experience of IEEEXtreme Programming Competition”